Categories
arduino C/C++ circuits Coding Embedded esp32 esp8266 expressif Internet of Things microcontrollers

ESP-32 : How to write multi-threaded application with priority, CPU core affinity, asynchronous non-blocking event driven loop.

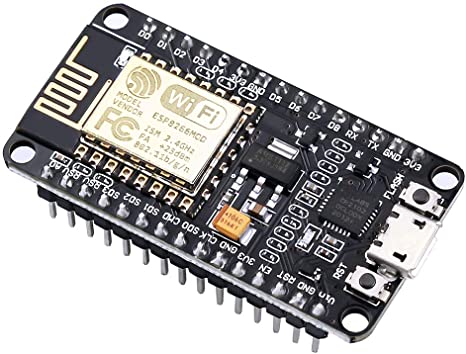
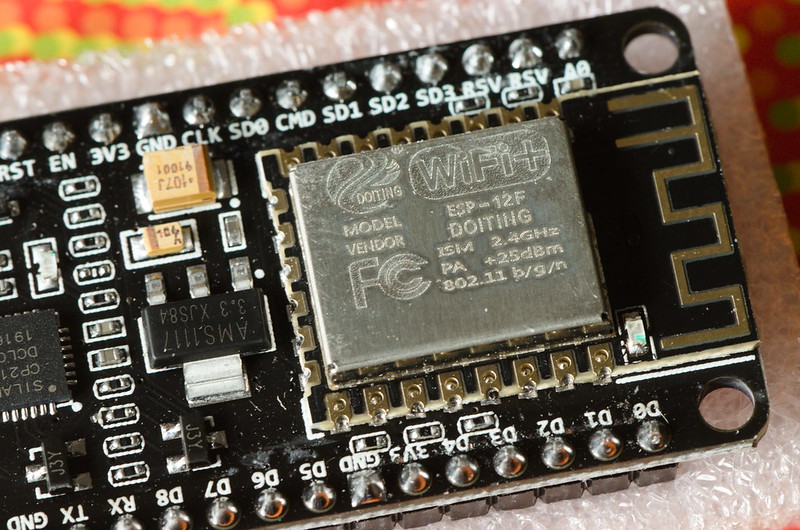
Espressif Systems Shanghai launched the game changing low cost ESP-8266 microcontroller in 2014 – a key enabler for embedded Internet of Things (IOT) development.

Internet of Things (IOT)

Adding WiFi 802.11 and Bluetooth LE wireless connectivity to system on a chip (SoC) product costing roughly price of a cup of coffee meant innovators and micro electronics DIY enthusiasts could easily interface edge smart sensor or legacy hardware systems with cloud or mobile devices.

The successor chip ESP-32 (launched 2016) introduced Xtensa LX6 processor and FreeRTOS (a real time operating system (OS) for embedded) – enabling multi-threaded applications running on multi core CPU architecture.

To add context, many even relatively complex tasks especially automation, can be run on tiny embedded 8 bit processor such as Arduino. More complex applications, video, audio signal processing, image recognition or AI require much more compute power.

ESP-32 in the eco-system sits between Arduino and more powerful systems Raspberry Pi, Windows or Embedded Linux.

Sounds great, but how does it work in practice?

ESP8266

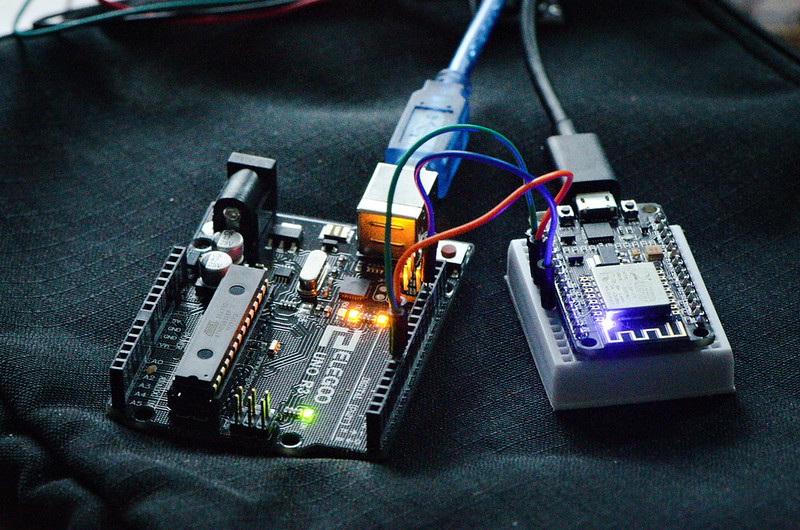
In this sketch ( https://github.com/steveio/arduino/tree/master/ESP32GPSMultiTask ) we assemble a UBLOX GPS data logger with an SD card internal storage, LoRaWAN wireless relay and an OLED display.


The goal is to demonstrate running 4 separate non-blocking tasks concurrently using FreeRTOS to schedule tasks, suspend, interrupt, queue and share data in thread-safe way with mutex semaphore locks.

Let’s take a look at the code…. concentrating on FreeRTOS multi-core multi-thread potential, rather than peripherals / sensors.

Data Structures, Multi-thread Semantics & Setup()

First, a struct to encapsulate core data model message (GPS data):

// GPS position data
struct XPosit
{
float Lat;
float Lon;
float Alt;
float Course;
float Speed;
} xPosit;

Next two semaphores to serialise reading and writing tasks to ensure data consistency:

// Semaphores to lock / serialise data structure IO
SemaphoreHandle_t sema_GPS_Gate;
SemaphoreHandle_t sema_Posit;

Then a pointer queue for passing messages between threads / tasks:

// GPS position data queue
QueueHandle_t xQ_Posit;

Here is the related setup():

sema_GPS_Gate = xSemaphoreCreateMutex();
sema_Posit = xSemaphoreCreateMutex();

xSemaphoreGive( sema_GPS_Gate );
xSemaphoreGive( sema_Posit );

Now let’s define 4 tasks:

// task handles
static TaskHandle_t xGPSTask;
static TaskHandle_t xLoRATask;
static TaskHandle_t xSDWriteTask;
static TaskHandle_t xOLEDTask;

// hexadecimal notification code
define GPS_READ_BIT 0x01
define LORA_TX_BIT 0x02
define LORA_RX_BIT 0x04
define SD_WRITE_BIT 0x06
define OLED_BIT 0x08

ISR / Interrupt for Asynchronous Non-Blocking Event Loop

The system will be driven by a periodic ISR timer raising an interrupt calling a handler routine running & managing tasks.

Keeping loop() empty results in non-blocking program execution, no waiting on calls to delay() in main routine – and we only need to call ISR once every ten seconds to read GPS (rather than polling loop()) – which is better for low power consumption.

Under the hood FreeRTOS works in the same way:

> FreeRTOS implements multiple threads by having the host program call a thread tick method at regular short intervals. The thread tick method switches tasks depending on priority and a round-robin scheduling scheme.
( https://en.wikipedia.org/wiki/FreeRTOS#References )

With a task based modular event driven architecture, failure of one task – if write to SD card task blocks or fails because there is no storage card present), other tasks – reading GPS messages, LoRaWAN radio transmit continue.

// ISR timer
hw_timer_t * timer = NULL;
portMUX_TYPE timerMux = portMUX_INITIALIZER_UNLOCKED;
unsigned long isrCounter = 0;

ISR Handler Function (Main control routine, replaces loop()):

// ISR Interupt Handler
void IRAM_ATTR fLoRASendISR( void )
{
portENTER_CRITICAL_ISR(&timerMux);

// Main program routine here ..

portEXIT_CRITICAL_ISR(&timerMux);
}

In setup() we schedule ISR timer:

// Configure Prescaler to 80, as our timer runs @ 80Mhz
// Giving an output of 80,000,000 / 80 = 1,000,000 ticks / second
timer = timerBegin(0, 80, true);
timerAttachInterrupt(timer, &fLoRASendISR, true);

// Fire Interrupt every 10s (10 * 1 million ticks)
timerAlarmWrite(timer, 10000000, true);
timerAlarmEnable(timer);

FreeRTOS Task (Thread) Setup

Next in setup() we describe & initialise tasks, specify which CPU core they should run on, their priority and a few other details

// create a pointer queue to pass position data
xQ_Posit = xQueueCreate( 15, sizeof( &xPosit ) );

Serial.print("Start Task fGPS_Parse() priority 0 on core 0");
xTaskCreatePinnedToCore( fGPS_Parse, "fGPS_Parse", 1000, NULL, 0, &xGPSTask, taskCore0 );
configASSERT( xGPSTask );


Serial.println("Start Task fSD_Write() priority 4 on core 1");
xTaskCreatePinnedToCore( fSD_Write, "fSD_Write", 1000, NULL, 4, &xSDWriteTask, taskCore1 ); // assigned to core 1
configASSERT( xSDWriteTask );

Serial.println("Start Task fLoRA_Send() priority 3 on core 1");
xTaskCreatePinnedToCore( fLoRA_Send, "fLoRA_Send", 1000, NULL, 3, &xLoRATask, taskCore1 ); // assigned to core 1
configASSERT( xLoRATask );

Here’s how to have a task start and wait suspended pending a notification. LoRaWAN transmit task starts and waits until read GPS notifies of new message to send; no need to constantly run radio draining battery or poll the message queue.

for( ;; )
{
/* block until task notification */
xResult = xTaskNotifyWait( LORA_TX_BIT,
                     ULONG_MAX,        /* Clear all bits on exit. */
                     &ulNotifiedValue, /* Stores the notified value. */
                     portMAX_DELAY );  /* Block indefinately */

if( xResult == pdPASS ) 
{

Executing FreeRTOS threads : ISR Main Routine

In main ISR program loop, here’s how to notify tasks:

BaseType_t xHigherPriorityTaskWoken = pdFALSE;

/* Notify (trigger) Read GPS
xTaskNotifyFromISR( xGPSTask,
                   GPS_READ_BIT,
                   eSetBits,
                   &xHigherPriorityTaskWoken );

/* Notify LoRA send task to transmit by setting the TX_BIT */
xTaskNotifyFromISR( xLoRATask,
                   LORA_WRITE_BIT,
                   eSetBits,
                   &xHigherPriorityTaskWoken );

Inter process Communication (IPC): Semaphore Mutex Locks

Concurrency & data consistency in real time and multi threaded systems requires care to ensure serial ops – a write by one thread to a data struct for example must not corrupted by another concurrent thread.

The classic answer to this is locks – mutex, semaphores. A thread requests obtains & takes a lock and other tasks block (wait, retry). The lock is revoked only when lock holding task completes or rolls back.

Here is how it’s done in FreeRTOS:

   if ( xSemaphoreTake( sema_GPS_Gate, xTicksToWait0 ) == pdTRUE )
{
 if ( xSemaphoreTake( sema_Posit, xTicksToWait1000 ) == pdTRUE )
    {
      xPosit.Lat = gps.location.lat();
      xPosit.Lon = gps.location.lng();
      xPosit.Alt = gps.altitude.meters();
      xPosit.Course = gps.course.deg();
      xPosit.Speed = gps.speed.kmph();

      xSemaphoreGive( sema_Posit );
    }


    if ( xSemaphoreTake( sema_Posit, xTicksToWait1000 ) == pdTRUE )
    {
      Serial.println("xQueueSend()");
      pxPosit = &xPosit;
      xQueueSend( xQ_Posit, ( void * ) &pxPosit, ( TickType_t ) 0 );  
      xSemaphoreGive( sema_Posit );
    }

    xSemaphoreGive( sema_GPS_Gate );
  }

FreeRTOS : Message Queue

Those interested in using Queue’s (a sized FIFO pointer linked buffer) to pass data between tasks should consult the API reference:

https://www.freertos.org/a00018.html

// Examples:

// Writing
if ( xSemaphoreTake( sema_Posit, xTicksToWait1000 ) == pdTRUE )
        {
          pxPosit = &xPosit;
          xQueueSend( xQ_Posit, ( void * ) &pxPosit, ( TickType_t ) 0 );  
          xSemaphoreGive( sema_Posit );
        }

// Reading..
struct XPosit xPosit, *pxPosit;
  
 if( xQueueReceive( xQ_Posit,
                         &( pxPosit ),
                         ( TickType_t ) 10 ) == pdPASS )
      {

Conclusion

Espressif changed the game in 2014 with ESP8266 – bringing WiFi & Bluetooth to Arduino’s eco-system of low cost interoperable sensors & components – the internet of things (IOT) long promised since at least 1980s as “smart home” concept finally came of age.

Modern mobile devices and laptops are now so incredibly complex as to be virtually indecipherable, especially at hardware / OS level – to most people, even those within IT industry.

Arduino made it possible for students, DIY enthusiasts, makers & researchers to work with Microcontrollers in a way that is relatively simple, comprehensible and fun. No longer do you necessarily need a PhD, work for tech giant or own a CPU manufacturer to build a micro-electronics project.

By adding WiFi, Bluetooth & LoRaWAN wireless, Espressif opened door to new information age of cloud connected smart sensor & control devices. IOT smart home devices & solutions from Amazon AWS and Google (Matter) are already available in marketplace.

But the option endures – those who wish to can make their own or projects or use a component approach to Internet connect existing machines.

It remains to be seen in decades to come whether people use this tech for good, to benefit people, to make things better; or for nefarious activities – stalking, tracking, surveillance; or worse AI enabled weapons…

(my plan for this prototype was to add 6 axis accelerometer, attach prototype to a stunt kite, aquire some flight input data, create some cool real time web visualisations and explore some more Python SciPi, Mathplotlib & Pandas libraries (alas the prototype proved too fragile to get off the ground).

Anyway hope this tutorial helps you, it took me 30 years to even vaguely understand micro electronics hardware, multi-threading, c++…

Categories
arduino C/C++ esp8266 Internet of Things Python Software WebSockets

WebSocket Binary – ESP8266 to Web Browser

Binary wire protocols are long established for embedded machine to machine (M2M) communication, network applications and wireless radio data transmission.

Internet of Things (IOT) devices, real time sensors, robotics, smart home of industrial machine control data also demand efficient, low latency & lightweight data communications.

WebSockets ( RFC6455 ) protocol brings native support for binary framed messaging to web browser clients, offering a compact lightweight format for fast and efficient endpoint messaging.

Why use binary format data messaging?

Compared to serialisation of more complex text based wire formats, binary is lightweight and requires minimal storage / bandwidth and processing.

Taking an example key/value command data message:

// JSON encoding
{"cmd":101,"value":180}
23 * 2 = 46 bytes

// CSV plain text encoding
101,180\n
9 * 2 = 18 bytes 

// Binary
101 180
int (4 bytes) + int(4 bytes)
4+4 = 8 bytes

In case of high performance applications supporting a large number of clients or very high frequency of data exchange, minimising data size, bandwidth and processing becomes an important priority.

Binary wire protocols are long established for embedded M2M messaging

Taking as a simple example an embedded ESP8266 WiFi device, message gateway and web browser client, data serialisation and bidirectional binary framed WebSocket data exchange are demonstrated.

ESP8266 Byte Array Serialisation

Internally data is represented in embedded microcontrollers as ones and zeros, sequences of bits arranged in addressable memory.

Higher level programming language abstraction provides human readable textual labels and in case of C/C++ associated type information.

Lets define a mixed type data structure that could be some kind of sensor or message data payload –

    // define mixed type data struct
    struct Data
    {
        int id;
        float v1;
        float v2;
        unsigned long v3;
        char v4[20];
    };

    struct Data data;

    // populate data values
    data.id = 67;
    data.v1 = 3.14157;
    data.v2 = -7.123;

    unsigned long ts = millis();
    data.v3 = ts;

    char c[20] = "N NE E SE S SW W NW";
    strncpy(data.v4, c, 20);

To access underlying bytes, a pointer to data structure address is created –

    uint8_t * bytePtr = (uint8_t*) &data;    
    webSocket.sendBIN(bytePtr, sizeof(data));

Data pointer and length are passed to WebSocket send method “webSocket.sendBIN()”, byte range is read, packaged (framed) according to protocol specification and written to TCP/IP network socket.

Hexidecimal and Binary text representation of in memory data structure can also be displayed –

void printBytes(const void *object, size_t size)
{
    const uint8_t * byte;
    for ( byte = (uint8_t *) object; size--; ++byte )
    {
        Serial.print(*byte, HEX);
        Serial.print("\t");
        Serial.println(*byte, BIN);
    }
    Serial.println('\n');
}

Python WebSocket Server

A Python3 middleware hosts WebSocket server and acts as a message relay gateway.

Binary WebSocket messages can be decoded in Python, the struct module performs conversions between Python data types and C structs –

async def wsApi(websocket, path):
    try:
        async for message in websocket:
            print('User-Agent: '+ websocket.request_headers['User-Agent'])
            print('Sec-WebSocket-Key: '+websocket.request_headers['Sec-WebSocket-Key'])
            print('MessageType: '+str(type(message)))
            print(message);
            print('Hex: '+message.hex());

            if isinstance(message, (bytes, bytearray)):

                i = message[:4];
                print(i);
                tuple_of_data = struct.unpack("i", i)
                print(tuple_of_data)

                tuple_of_data = struct.unpack_from("f", message, 4)
                print(tuple_of_data)

                tuple_of_data = struct.unpack_from("f", message, 8)
                print(tuple_of_data)

                tuple_of_data = struct.unpack_from("i", message, 12)
                print(tuple_of_data)

                tuple_of_data = struct.unpack_from("20s", message, 16)
                print(tuple_of_data[0])

                ## forward message
                await asyncio.wait([user.send(message) for user in USERS])

To index into byte array and read a number of bytes according to data type being unpacked Python’s array slice method “i = message[:4]” can be used where [<from>:<to>] specifies start/end positions.

Method struct.unpack_from() is another approach, taking as parameters a format character specifying data type (“i” – integer, “f” – float), data buffer and an index (in bytes) to read from.

Here is decoded binary message output including some WebSocket headers –

User-Agent: arduino-WebSocket-Client
Sec-WebSocket-Key: zoJ0aR/5XunSvEKKcUkWfQ==
MessageType: <class 'bytes'>
b'C\x00\x00\x00|\x0fI@\x9e\xef\xe3\xc0\xb9\x17\x00\x00N NE E SE S SW W NW\x00'
Hex: 430000007c0f49409eefe3c0b91700004e204e45204520534520532053572057204e5700
b'C\x00\x00\x00'
(67,)
(3.1415700912475586,)
(-7.123000144958496,)
(6073,)
b'N NE E SE S SW W NW\x00'

Web Browser – Binary Encode/Decode in JavaScript

In web browser, JavaScript primitives Blob, ArrayBuffer and TypedArray perform a similar conversion.

Firstly, received WebSocket messages (event object) can be debugged to console –

 websocket.onmessage = function (event) {
    console.log(event);

Binary framed data payload is reported as type “Blob” (raw data) of length 36 bytes –

Chrome Developer Tools console log for WebSocket Binary message receieve event

To de-serialise message, raw data Blob is converted asynchronously using FileReader API to ArrayBuffer, a generic fixed length binary data buffer –

    if (event.data instanceof Blob)  // Binary Frame
    {
      // convert Blob to ArrayBuffer
      var arrayPromise = new Promise(function(resolve) {
          var reader = new FileReader();

          reader.onloadend = function() {
              resolve(reader.result);
          };

          reader.readAsArrayBuffer(event.data);
      });

When promise is fulfilled, ArrayBuffer can be read using typed views (Uint32Array, Uint32Array) for integer (including long) and float types, TextDecoder API is used to decode character array –

arrayPromise.then(function(buffer) {

          // Decoding Binary Packed Data

          // int (4 bytes)
          var arrInt = new Uint32Array(buffer);
          var id = arrInt[0];
          console.log("id:"+id);

          // 2x float (4 bytes)
          var arrFloat = new Uint32Array(buffer,4);
          var v1 = arrFloat[0];
          var v2 = arrFloat[1];
          console.log("v1: "+v1);
          console.log("v2: "+v2);

          // long (4 bytes)
          var v3 = arrInt[3];
          console.log("v3:"+v3);

          // character data (20 bytes)
          var uint8Array = new Uint8Array(buffer,16);
          var string = new TextDecoder("utf-8").decode(uint8Array);
          console.log(string);
      });

JavaScript Binary Data Encoding

Binary data can also be encoded from native JavaScript. TypedArrays created for each data type – integer, float, long and character array are populated and packed into an ArrayBuffer suitable for use as WebSocket data payload –

console.log("Binary Encode example");

// Binary Encode example
var buffer = new ArrayBuffer(36)
var arrInt =   new Uint32Array(buffer, 0, 1);
arrInt[0] = 67;
var arrFloat = new Float32Array(buffer, 4, 2);
arrFloat[0] = 3.14157;
arrFloat[1] = -7.123;

var arrInt2 =   new Uint32Array(buffer, 12, 1);
arrInt2[0] = Date.now();

var uint8Array = new Uint8Array(buffer,16);
var charBuffer = new TextEncoder("utf-8").encode("N NE E SE S SW W NW");

for(var i = 0; i<charBuffer.length; i++)
{
  uint8Array[i] = charBuffer[i];
}

// send binary data
websocket.send(buffer);

At message gateway, logs demonstrate parity between data packed by embedded device and those sent from web browser client –

User-Agent: Mozilla/5.0 (X11; Linux x86_64) AppleWebKit/537.36 (KHTML, like Gecko) Chrome/69.0.3497.100 Safari/537.36
Sec-WebSocket-Key: 1TD9Zp71cMTivUbj+QSx5w==
MessageType: <class 'bytes'>
b'C\x00\x00\x00|\x0fI@\x9e\xef\xe3\xc0\x07\x1c\xff\x91N NE E SE S SW W NW\x00'
Hex: 430000007c0f49409eefe3c0071cff914e204e45204520534520532053572057204e5700
b'C\x00\x00\x00'
(67,)
(3.1415700912475586,)
(-7.123000144958496,)
(-1845552121,)
b'N NE E SE S SW W NW\x00'

Limitations / Drawbacks

Compared to UTF-8 text formats (XML, JSON) packed binary data has significant disadvantages –

  • legibility – text based key/value formats are easy to read, manipulate and maintain
  • fixed frame boundaries – using positional byte sequence indexes means even small changes to message structure, size or field position require updates to consumer client code
  • endianess / alignment / padding must be maintained consistently, compiler and platform implementation differences may occur

Security

WebSockets Secure (WSS) offers transport layer security (TLS) to encrypt data streams. An authentication and authorisation strategy (challenge/response password, token or certificate based) for client identification should also be deployed. Cryptographic message digest signing or encryption might also be used as extra protection for critical data.

Categories
arduino Coding Internet of Things nodejs Python Software

MQTT to Websockets with ESP32, NodeJS and D3.js

MQTT is a lightweight messaging protocol suitable for embedded and IOT devices.

Websockets ( RFC6455 – https://tools.ietf.org/html/rfc6455 ) is socket programming for internet, an evolution of browser / web server HTTP enabling real-time bidirectional data exchange and binary messaging.

How do we interface a MQTT enabled IOT sensor device with a web browser interface displaying a real time graph chart?

A real time web based barometric air pressure chart interface created with WebSockets and D3.js

Introduction to WebSockets – Real Time TCP Sockets for Internet

With modern browser engines and responsive web UI technologies built on HTML5, SVG and JavaScript frameworks, sophisticated visualisation, display and dashboard reporting capabilities have emerged.

Responsive Web UI runs in any browser installed device – laptop, dekstop, tablet or mobile, without need to install additional software or prepare application code for specific device architectures.

HTTP browser clients essentially implement a polling request/response technique for retrieving and updating HTML format webpages.

Due to need to establish a connection for each new request, HTTP is not well suited to real time or high volume messaging, charting or visualisation applications.

Although AJAX (asynchronous JavaScipt XML) and REST, SOAP API programming overcome this to a certain extent these methods are relatively inefficient for some use cases due to protocol overhead.

With Websockets, TCP network socket programming becomes possible in a browser client application.

Clients can establish a network socket connection, this channel remains open and two-way data exchange including binary messaging formats takes place.

Sockets are well established in UNIX and Windows OS client/server programming, but are relatively new to the web.

Arduino ESP32 Barometer Sensor MQTT Device

An ESP32 microcontroller with BMP280 environmental sensor and OLED LCD display

An environmental sensor based on an Expressif ESP32 micro-controller and BMP280 Bosch sensor reads air pressure, temperature and altitude –

#include <Adafruit_BMP280.h>

Adafruit_BMP280 bmp;

void setup() {

  if (!bmp.begin()) {
    Serial.println(F("Could not find a valid BMP280 sensor, check wiring!"));
    while (1);
  }
  
  /* Default settings from datasheet. */
  bmp.setSampling(Adafruit_BMP280::MODE_NORMAL,     /* Operating Mode. */
                  Adafruit_BMP280::SAMPLING_X2,     /* Temp. oversampling */
                  Adafruit_BMP280::SAMPLING_X16,    /* Pressure oversampling */
                  Adafruit_BMP280::FILTER_X16,      /* Filtering. */
                  Adafruit_BMP280::STANDBY_MS_500); /* Standby time. */  

}

void loop() {

  Serial.print(F("Temperature = "));
  Serial.print(bmp.readTemperature());
  Serial.println(" *C");

  Serial.print(F("Pressure = "));
  Serial.print(bmp.readPressure()/100); //displaying the Pressure in hPa, you can change the unit
  Serial.println(" hPa");

  Serial.print(F("Approx altitude = "));
  Serial.print(bmp.readAltitude(1019.66)); //The "1019.66" is the pressure(hPa) at sea level in day in your region
  Serial.println(" m");                    //If you don't know it, modify it until you get your current altitude

  display.clearDisplay();
  float t = bmp.readTemperature();           //Read temperature in C
  float p = bmp.readPressure()/100;         //Read Pressure in Pa and conversion to hPa
  float a = bmp.readAltitude(1019.66);      //Calculating the Altitude, the "1019.66" is the pressure in (hPa) at sea level at day in your region

  delay(2000);
}

Data is communicated over Wifi to an MQTT messaging server.

On Arduino we can use PubSub MQTT Library ( https://github.com/knolleary/pubsubclient ).

To set this up, first we define Wifi and MQTT server credentials and topic id (channels) and define a transmit data buffer:

const char* ssid = "__SSID__";
const char* pass = "__PASS__";

IPAddress mqtt_server(192, 168, 1, 127); // local LAN Address
const char* mqtt_user = "mqtt";
const char* mqtt_password = "__mqttpassword__";

const char* mqtt_channel_pub = "esp32.out";
const char* mqtt_channel_sub = "esp32.in";

WiFiClient wifi;
PubSubClient mqtt(wifi);

#define MSG_BUFFER_SIZE (128)
char msg[MSG_BUFFER_SIZE];

Then we setup Wifi connection:

  WiFi.begin(ssid, password);

  while (WiFi.status() != WL_CONNECTED) {
    delay(500);
    Serial.print(".");
  }

  Serial.println("");
  Serial.println("WiFi connected");
  Serial.print("Connecting to ");
  Serial.println(ssid);
  Serial.println("IP address: ");
  Serial.println(WiFi.localIP());

And attempt to connect to MQTT broker, sending a hello message:

void loop() {
  
  while (!mqtt.connected()) {
    Serial.print("Attempting MQTT connection...");
    // Create a random client ID
    String clientId = "ESP8266Client-";
    clientId += String(random(0xffff), HEX);
    // Attempt to connect
    if (mqtt.connect(clientId.c_str(), mqtt_user, mqtt_password)) {
      Serial.println("connected");
      // Once connected, publish an announcement...
      mqtt.publish(mqtt_channel_pub, "hello ESP32");
      // ... and resubscribe
      mqtt.subscribe(mqtt_channel_sub);
    } else {
      Serial.print("failed, rc=");
      Serial.print(mqtt.state());
      Serial.println(" try again in 5 seconds");
      // Wait 5 seconds before retrying
      delay(5000);
    }
  }

  mqtt.loop();
}

After reading, we can transmit sensor values (Temperature T, Pressure P, Altitude A) on ESP32:

  snprintf(msg, MSG_BUFFER_SIZE, "%.2f,%.2f,%.2f", t, p, a);

  Serial.print("Publish message: ");
  Serial.println(msg);
  mqtt.publish(mqtt_channel_pub, msg);

MQTT to WebSocket RFC6455 – Node.JS Relay

On server we require a relay to subscribe for MQTT messages on sensor device channel, establish a WebSocket and write data to connected browser clients.

An implementation in NodeJS requires WS, MQTT and events libraries:

// setup Websocket Server
const WebSocket = require('ws');
var ws_host = "192.168.1.127";
var ws_port = "8080";
const wss = new WebSocket.Server({ host: ws_host, port: ws_port });
var ws = null;

// Setup MQTT Client
// mqtt[s]://[username][:password]@host.domain[:port]
var mqtt = require('mqtt'), url = require('url');
var mqtt_url = url.parse(process.env.MQTT_URL || 'mqtt://192.168.1.127:1883');
var auth = (mqtt_url.auth || ':').split(':');
var url = "mqtt://" + mqtt_url.host;
var mqtt_channel_in = "esp8266.in";
var mqtt_channel_out = "esp8266.out";

var options = {
    port: mqtt_url.port,
    clientId: 'mqttjs_' + Math.random().toString(16).substr(2, 8),
    username: 'mqtt',
    password: '__mqtt_password__',
    keepalive: 60,
    reconnectPeriod: 1000,
    protocolId: 'MQIsdp',
    protocolVersion: 3,
    clean: true,
    encoding: 'utf8'
};

NodeJS is event based, when an MQTT message is received it can be forwarded to all connected WebSocket clients:

mqttClient.on('message', function sendMsg(topic, message, packet) {

  console.log(topic + ": " + message);

  var eventListeners = require('events').EventEmitter.listenerCount(mqttClient,'message');
  console.log(eventListeners + " Listner(s) listening to mqttClient message event");
  console.log(mqttClient.rawListeners('message'));

  wss.clients.forEach(function each(ws) {
    if (ws.isAlive === false) return ws.terminate();
    console.log(data);
    ws.send(data+" ");
  });

});

MQTT allows many subscribers to receive topic messages.

Python Eclipse Paho MQTT client with Mongo DB

A client based on Eclipse Paho ( https://www.eclipse.org/paho/ ) developed in Python might add persistence by writing to a Mongo DB datastore:

### Python MQTT client
### Subscribes to an MQTT topic receiving JSON format messages in format:
###    [{"ts":1586815920,"temp":22.3,"pressure":102583,"alt":76}]
###
### Writes receieved JSON data to a mongo DB collection
###
import paho.mqtt.client as mqtt
import json
import pymongo

mqtt_server = "192.168.1.127"
mqtt_port = 1883
mqtt_keepalive = 60
mqtt_channel_out = "esp8266.out"
mqtt_channel_in = "esp8266.in"

mongo_server = "mongodb://localhost:27017/"
mongo_db = "weather"
mongo_collection = "sensorData"

def on_connect(client,userdata,flags,rc):
    print("Connected with result code:"+str(rc))
    print ("MQTT server: "+mqtt_server+", port: "+str(mqtt_port));
    print ("MQTT topic: "+mqtt_channel_out);
    client.subscribe(mqtt_channel_out)

def on_message(client, userdata, msg):
    print(msg.payload)
    parsed_json = (json.loads(msg.payload))
    res = sensorData.insert_one(parsed_json[0])

mongoClient = pymongo.MongoClient(mongo_server)
mydb = mongoClient[mongo_db]
sensorData = mydb[mongo_collection]

mqttClient = mqtt.Client()
mqttClient.connect(mqtt_server,mqtt_port,mqtt_keepalive);

mqttClient.on_connect = on_connect
mqttClient.on_message = on_message

mqttClient.loop_forever()

Web Browser Client – D3.js WebSocket Real Time Chart

WebSockets are supported natively in JavaScript by modern browser clients.

Setting up a WebSocket client, we consider re-connect attempts and parse received message data (JSON format in this example):

      <script type="text/javascript">

        var dataArr = [];

        var ws = null
        var maxReconnectAttemps = 10;
        var reconnectAttempts = 0;

        // setup WebSocket
        function setupWebSocket()
        {

          reconnectAttempts = 0;

          ws = new WebSocket('ws://192.168.1.127:8080',[]);

          ws.onopen = function () {
            console.log('WebSocket Open');
          };

          ws.onerror = function (error) {
            console.log('WebSocket Error ' + error);
          };

          ws.onmessage = function (e) {
            var rawData = e.data;
            if(rawData.trim().length > 1 &amp;&amp; rawData.trim() != "undefined")
            {
              try {

                var jsonObj = JSON.parse(rawData);
                jsonObj[0]['t'] = jsonObj[0]['t']; // temperature
                jsonObj[0]['p'] = jsonObj[0]['pressure']; // air pressure
                jsonObj[0]['a'] = jsonObj[0]['alt']; // altitude

                dataArr.push(jsonObj);

              } catch(e) {
                  console.log("Invalid JSON:"+rawData.toString());
              }
            }
          };
        }

        // check connection status every 60sec, upto maxReconnectAttemps, try reconnect
        const interval = setInterval(function checkConnectStatus() {
          if (reconnectAttempts++ < maxReconnectAttemps)
          {
            if (ws.readyState !== ws.OPEN) {
               console.log("WS connection closed - try re-connect");
               setupWebSocket();
            }
          }
        }, 60000);

        document.addEventListener("DOMContentLoaded", function() {
            setupWebSocket();
        });

Finally D3.js ( https://d3js.org/ ) is used to render chart as HTML5 / SVG.

D3.js real time barometer chart with WebSocket data provisioning

Source code and documentation can be found here:

Barometer D3.js:
http://bl.ocks.org/steveio/d549b0610fd489e6a09df8f2aa805ad3
https://gist.github.com/steveio/d549b0610fd489e6a09df8f2aa805ad3

ESP32 wifi Arduino MQTT sensor Client:
https://github.com/steveio/arduino/blob/master/ESP32SensorOLEDWifiMQTT/ESP32SensorOLEDWifiMQTT.ino

MQTT to WebSocket NodeJS relay:
https://github.com/steveio/mqttWebSocket